Archive for the ‘Miniatures’ Category

h1

A gamer or a collector?

July 16, 2009

These last few days I’ve been thinking about the following question:

Am I ever going to game all those scenarios I’m designing, or use the forces and gaming tables that I’m building for actual gaming?

For someone who’s invested a fair amount of money and time in collecting, putting together and painting a ton of miniatures and scenery, this might seem like a strange question. Surely all that stuff has been bought for a reason, and that reason is gaming. What use is a gaming table if it’s never played on? Why pick up two opposing forces if you’re not going to get some dice rolling? Good questions, indeed.

I was introduced to the hobby by my two older brothers, who were avid RPG gamers way back when the D&D red box was all the rage – it was even translated into Finnish – and who used to buy and paint all sorts of fantasy miniatures to use with roleplaying games. I was around 6-7 years old, and the little toy soldiers fascinated me. My brothers would paint them up, and of course I wanted to try that too. After I had dunked a mini or two completely in a jar of paint (I figured that’d be the quickest way to basecoat) they decided that I’d painted enough and would have to  wait a few years before trying again.

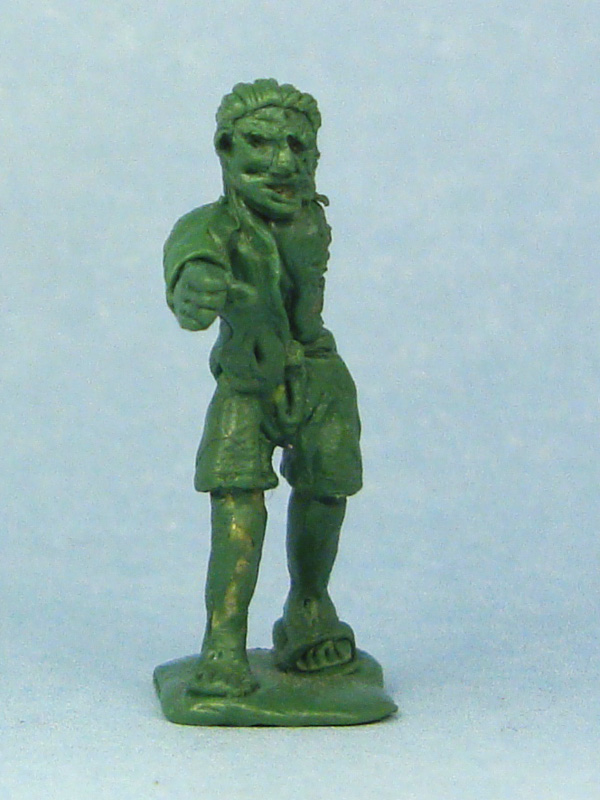
That few years turned into 6. I kept on playing RPGs and while I was familiar with miniatures, I didn’t see the use in buying them. If we needed miniatures to represent and clarify a combat situation, we’d dig into the old plastic box where my brothers’ more or less painted stuff was. Or we just used pennies or whatever we had at hand. And then I was introduced to WHFB. The stuff was like crack, and I was instantly hooked. It didn’t take me a long while to assemble my first army of miniature orcs and memorize all the fiction in the army book and the rules.  And the painting! I painted them slowly and meticulously, at a pace at which it must’ve taken me 4-5 hours for every single miniature, and looking back I can’t see where all that time went, the minis really aren’t much to look at.

Anyhow painting wasn’t the important thing. Painted miniatures looked better, sure, but it was the gaming that counted. We would spend hours and hours designing army lists that exploited every little loophole in the rules. If your opponent was bringing a knife, you brought not only a gun but slash-proof vest as well. If he had a unit that was immune to psychology, you brought a magic item that ignored psychology rules altogether. And so on and so on. Most of our armies were unpainted, and we used a lot of proxies. An empty base was a giant, a troll was an ogre and a dragon was a chariot. We didn’t really mind, as the painting and the miniatures themselves were clearly of secondary importance compared to the game itself.

Years went on. Armies grew and started to have more paint on them than before. The spirit of the games shifted in a friendlier direction, as new rules and slowly amounting maturity stopped the games from becoming simple tasks of army optimization. Slowly but surely narrative began to creep in. Units were not chosen solely for their combat prowess or special abilities, but for their flavour as well and themed armies started surfacing. The games were still competitive affairs, but now it was becoming more and more fun even when you were losing. It was – and is today – common for us to narrate whatever was happening with the rules, leading to some hilarious battles. It somewhat lessened the frustration of seeing your entire army devastated in two turns, too. The majority of our gaming group have always been RPG gamers first and wargamers second, which might explain our tendency towards narration.

With battles coloured with narration, the same narrative thinking started making its way to my painting as well. As I was painting a miniature I was wondering what his name was, and what the story behind him was. It was glorious to place a unit of such individuals on the table, and awful to see them swept away with a bad roll of the dice. I started to get the feeling, that the best part about creating a unit of miniatures wasn’t actually using them, but instead the process of painting them and giving them life through background stories and painted and modelled detail. It was like a doll house: creating an intricate model of a house for dolls becomes much more pleasing than actually playing with the dolls themselves.

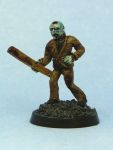
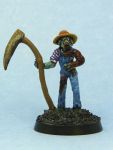
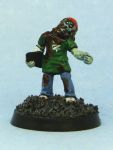
When you combine a narrative mentality like that with my overall tendency for excitability for whatever I think is cool for the moment – mostly due to a book read or a movie seen – it’s no wonder that I tend to easily pick up a bunch of models for this or that genre, which I will paint up and not game with as I shift my attention to something completely different. Aliens, predators, colonial marines, vampires, werewolves, vampire hunters, werewolf hunters, zombies, zombie hunters, post-apocalyptic dragon hunters…you name it. Sure, I always think of all the good games I’m going to have using whatever miniatures I’m painting at the moment, but very rarely end up playing the games. They turn out much more fun when reality is not allowed to mess with good solid fantasy.

Where am I going with all this rambling? Maybe it’s just the question of me no longer seeing myself as a miniature gamer, but as a miniature collector or modeller instead. My approach to the hobby is starting to resemble that of the doll house enthusiast or the model railway hobbyist, as the process of building something and adding details and narrative to it is becoming more important than actually using the thing “as intended.”

As a roleplayer, however, I find the idea of blending RPGs and wargames intriguing. Could it be possible to retain the best elements of both and combine them into a seamless system sporting both the strong narrative element of RPGs and the strategic and gaming element of wargaming? That’s what I’m looking for in my gaming. If I ever manage to nail it, I’ll be sure to let you know. I’ll probably type up a full post one day when the mood strikes me.

Now, to answer the question presented at the start of this post:

Probably not. But with all the fun had with the designing, painting, building and all, it’s not really a big loss, is it?

Oh, and we’re having our annual WHFB summer bash in a week or so. Even with all the fancy-pants talk about narration, it’s always a special feeling rolling 20d6.

h1

HorrorClix zombies – a review

July 2, 2009

From Wikipedia:

HorrorClix is a collectible miniatures game by WizKids Inc., and was released August 30, 2006. The game’s tagline is “wicked fun.” The product was discontinued when WizKids owner Topps shut down the company.


The “Clix” series of games features pre-painted plastic miniatures. Each game piece comes with a special dial base – which makes the clicking sound from which the games take their name – containing the gaming stats of the piece. The painting standard on the models varies massively, with some sporting a good amount of detail and shading while others are crudely painted in block colours. The plastic used is softer than that in most plastic wargaming miniatures and I’ve heard of it being spoken of as vinyl, which just might be the case.

Every now and then discussion sparks up on miniature forums on the suitability of Horrorclix zombies for 28mm gaming. Arguments are varied: they’re too big, they’re horribly painted, they’re dirt cheap, they’re wonderful, they’re awful, they’re too soft, the clicky bases are a pain and so on. Reviews exist, but I haven’t been able to find anything detailed enough so decided to tackle the thing myself.

For this review I picked the eight Horrorclix zombies that I’ve bought. A few others exist, but from the pictures I found them rather unappealing and skipped ordering them. It has to be mentioned, that there are a few nice ones missing from this review, as they are somewhat rare and thus pricey. As mentioned above, all the models come on clicky bases, which most gamers will probably want to remove. This is easily done by sliding a sharp craft knife under the miniature’s foot and either slicing through or popping the foot free of the base by gently twisting the blade. The models are pre-painted, but I don’t really feel that it’s necessary to strip them of their paint. Just give them a new basecoat or paint over the existing paintjob, both should work. Or if you don’t fancy yourself much of a painter, the models can be used as-is, as they have been painted to a sufficient gaming standard.

Horrorclix minis are a bit larger than 28mm, being closer to 33mm in scale. This doesn’t really bother me, as once the models are based like the others in my collection you don’t really pay much attention to the small difference in scale. Size comparison pics later on in the review. I have based the Clix on standard 25mm round slottabases.

Model # 1 – Zombie Patient is an elderly male in a bloodied hospital gown. He’s missing his left hand altogether, while a large piece of skin is missing from his right arm, exposing muscles beneath. There’s also damage to his face, as he has also lost his lips and most of his nose, although the sculpting does give him a bit of a lampreyish look. The hand and feet are a bit thick and he doesn’t really have a wrist even on the remaining arm. He has a nice shuffling zombie walk going on, and the hospital look adds to his creepiness.

Model #2 – Undead Vendor is an awful miniature, and in a bad way. The concept is fun, a vendor like those you see in baseball and handegg games and the like, undead but still selling his wares. That’s where the fun ends, though. The anatomy appears off, with spindly legs and arms and malformed hands, the pose is something you’d see in a disco for the aesthetically challenged and the hand holding the bottle doesn’t look like it’s holding anything. Instead it’s like a bottle has been glued to an open hand. The vendor’s tray has a severed hand and forearm alongside the bottles, which might be considered humorous.

Model #3 – Zombie Strongman is a positively huge fellow, standing tall at roughly 40mm. In addition to a sweet moustache he has a pair of shorts on, and is bound with padlocked chains, through which coils of entrails pour out. Half of the strongman’s right calf is missing, exposing the bone, and he has various wounds about his body. He holds aloft the severed one-armed torso of some hapless victim, again trailing guts. I love this model. He oozes raw, brutal strength uncontained by any conventional intelligence. He towers over 28mm miniatures in a good sense and in keeping with the scale. Just imagine a huge pro wrestler turned into a zombie.

Model #4 – Zombie Lawyer might be considered the embodiment of poetic justice. He’s wearing a tattered brown suit and has a sharp piece of metal – a crossbow bolt? – sticking through his right thigh. Bones and muscles show through in several places, and the left ankle is completely twisted around. The model is in a nice, classic shuffling stance and all in all is a nice addition to your horde.

Models #1-4

Models #1-4

Model #5 – Zombie Trooper is in my opinion the pick of the bunch, being a great sculpt of a good concept. While he lacks major visible damage, his emaciated features and classic pigeon-toed stance are a sure giveaway of his state. The trooper still carries his MP5 SMG, and wears body armour complete with a helmet and com-link set. The paintjob is better than average, too. I could use this model straight from the package, but I’ll paint him to match the SWAT survivors that I have.

Model #6 – Zombie Cop is another unfortunate public servant to fall to the undead menace. His clothes are torn, he’s missing half of his face exposing the skull, his right ankle has been chewed to the bone and coils of entrails pour out from his stomach. His sidearm is still securely in its holster, suggesting that he was attacked and taken completely by surprise. Again, a pigeon-toed classic stance and all in all a nice model.

Model #7 – Hardhat Zombie is a solid blue collar worker wearing what I suppose is something like a track jacket and a pair of jeans along with the eponymous yellow hardhat. His entire right arm is missing, as well as his left shoe. These combined with the pigeon-toes, vacant stare and tongue lolling out make him a prime example of a zombie. The sculpt is fine, and the model is an overall good effort.

Model #8 – Zombie Ventriloquist is a refreshingly twisted concept. I’ve always loved characterful and creepy special zombies, such as Romero’s zombie clowns and Dixieland band, Studio Miniatures’ zombie chicken mascot and so forth. It’s no surprise, then, that the zombie ventriloquist with his classic puppet and worn and torn suit is right up my alley. The model is almost bald and somewhat hunched, suggesting an elderly gentleman, and as a nice touch he has a wedding band on his left hand. While there is no major damage, the numerous holes, nicks and cuts in both his suit and his skin imply that he has been undead for quite a while. Buy this model, he’s excellent.

Models #5-8

Models #5-8

And here are two size comparison shots. Unfortunately I forgot to put in a Mega Miniatures zombie, look here for comparison.

From left to right: Games Workshop, HorrorClix, Hasslefree, Copplestone Castings, HorrorClix

From left to right: Games Workshop, HorrorClix, Hasslefree, Copplestone Castings, HorrorClix

From left to right: Games Workshop, HorrorClix, Recreational Conflict, Studio Miniatures, HorrorClix

From left to right: Games Workshop, HorrorClix, Recreational Conflict, Studio Miniatures, HorrorClix

HorrorClix zombies can be bought from various sources, with many gaming stores selling single miniatures for a pittance. Most of mine cost well under a euro apiece from Miniature Market, which I found to be one of the best retailers available in terms of stock, price and shipping costs. Do a Google search for “HorrorClix singles” for plenty of dealer options.

Overall verdict: HorrorClix zombies are very nice miniatures for a cheap price. There are people who scoff at pre-painted plastic, but it’s entirely their loss when it comes to these, as any zombie miniature collector would do well to check these out. As the comparison pic shows, though, the HorrorClix zombies are a bit taller than your average 28mm heroics and giants compared to true 28mm, so scale purists will want to avoid these. The pre-painted part will be a burden or heaven-sent gift to some, depending on painting skill. Do note that the quality of the sculpts and the paintjobs varies immensely, with others like the trooper being mighty fine and others complete rubbish.

h1

Zombies by Recreational Conflict – a review

June 6, 2009

I can’t remember how I ran into Recreational Conflict. Maybe they were listed in some forum discussion, maybe I was just googling for zombie miniatures, I’ve no idea. However, I’m happy I did.

The last few weeks have been pure zombie miniature goodness for me. Not only did I buy the Studio Miniatures zombies which probably are the best on the market (for reviews, see here and here, they already said the same things I would), but followed it up with Recreational Conflicts’ miniatures which aren’t far behind.

Recreational Conflict sells 8 different zombies in their Lead Bones range, all of them sculpted by Brian Cooke. The models span a wide range of concepts, and will add a nice touch of variety to your zombie horde.

Model #1 – Chewed Up Shambler is a fairly generic modern male zombie. He has a warm looking fur-lined jacket on and has not only lost one of his shoes, but his left arm from the elbow down as well. There’s a large chunk of meat missing from his chest, exposing the ribcage. There’s a bullet hole in his back as a nice detail. The model’s face is very skeletal, which I think lets an otherwise lovely model down a bit as there’s no expression on his face. The face is well sculpted, though!

Model #2 – She Was The Sherrif is again really what the name tag says, a female police officer. The model is fine, if a bit boring pose- and face-wise. Bonus points for the empty gun holster and elegant damage, as the poor lady has had her throat torn out some. This one might be the weakest of the 8, though, simply for the bore aspect.

Model #3 – Skewered Vicar is my favourite of all the RC zombies. As the name suggests, he’s a priestly type who has had a large grave marker sized cross rammed through his chest. Apart from that he’s not really sporting other injuries. The vicar is set in a wonderfully vacant and casual zombie pose. The model comes with a hole through the chest and a separate cross. A tiny bit of filing was required to fit the cross in the hole, but the amount of work was minimal.

Model #4 – Chopper/The Beard is a biker type, wearing a Prussian spiked helmet (with a massive spike!) and sunglasses in addition to his normal clothes. This model baffles me a bit. The pose is a bit awkward, which can be explained through zombieness, but the lack of damage and other zombie features make this model a potential survivor as well. There are three teeny tiny holes in his back and two in his front which I assume are bullet holes. However, there is no corresponding damage on the other side, and the holes are small indeed. That leaves this model in a bit of a limbo, as it isn’t really very zombie-like, and the awkward pose eats from his suitability as a survivor. The only skin visible is on his hands, his nose and his cheeks, so he isn’t really easy to zombify by painting either. He competes with #2 for the title of weakest mini.

The first four models. They've been given a black ink wash to bring out the detail

The first four models. They've been given a black ink wash to bring out the detail

Model #5 – Sharkbait is a different story altogether. A gruesome zombie surfer in a pair of shorts, with the entire left half of his upper body missing and what’s left of his ribcage showing. For further evidence of his demise Sharkbait carries what’s left of his half-eaten surfboard. He still has his ankle strap, used to keep a surfer’s board from straying too far if he falls over, on. The remains of the strap are hanging from the board’s end. This kind of loving attention to small detail really makes for a nice mini.

Model #6 – Sister Mary is a zombie nun, which we can never have too many. She’s a lovely sculpt with a torn habit which shows that one of her impressively large breasts has been torn off exposing the ribs. She wears her rosary beads and crucifix around her waist.

Model #7 – Altar Boy adds to the too-slowly growing number of zombie children miniatures available. The sculpt is simple and flat, with the only damage being a missing right arm. Come to think of it, I don’t think I’ve seen a zombie kid sporting a lot of damage. Maybe it’s just the size of the sculpt, or is the subject still a bit taboo? This little altar boy combined with the nun and vicar above should be proof enough that religion simply won’t keep you from being eaten by the undead.

Model #8 – Thin Lizzy is a thin punk rocker zombie girl wearing an oversized – her boyfriend’s, maybe? – leather jacket, a miniskirt and a pair of combat boots. The model is very tall, the size of Sharkbait and standing half a head taller than Sister Mary. The sculpting is nice, with chains hanging from both her belt and her leather jacket and a mohawk hairdo on her head. Oddly enough the skirt only has fold on the backside and not on the front. Could be a fashion thing, can’t really tell. As with model #1, I feel that this model is let down by her skeletal head, which is basically just a skull. Yes, a skull with a mohawk on top. All the comments that apply to #1 apply here as well. Still, I like her!

The last four models

Models #5-8

The overall quality of the RC zombies is excellent. They are crisp, clean sculpts and quality casts with next to no flash. A few models had some tiny moldlines to scrape off, but other than that they were fine out of the box. The zombies are set on cast round bases.

I liked the variety of the sculpts, as well as the nice gender distribution. Three of the eight miniatures were female, one of the five males was a child. There were some nice specialties to stand out from your horde, namely the clerical types, the surfer, the biker and the punk rocker and the cop…basically everyone apart from #1. Sizewise the models fit perfectly with other 28mm manufacturers, being of average build. See the size comparison below for reference.

From left to right: Games Workshop, Recreational Conflict, Copplestone Castings, Mega Miniatures

From left to right: Games Workshop, Recreational Conflict, Copplestone Castings, Mega Miniatures

You can buy the models separately at the price of $2.50 each, or in sets of four for the price of $10, amounting to…waaaait a minute, $2.50 each! Funnily enough, I didn’t even notice this while ordering. While this doesn’t offer you a discount, neither are you stuck with having to buy minis you don’t want to save money on individuals. Shipping costs are very reasonable, too, with overseas shipping for the eight miniatures being only $5.00. For comparison purposes, many US companies charge ~$20 for a similar order, effectively doubling the price of the miniatures.

Overall verdict: I would definitely recommend Recreational Conflict’s zombies to everyone looking to add quality to their 28mm horde. They are fine minis, and have made me consider buying some of RC’s S.P.R.U. agents to fight them.

The miniatures are available directly from Recreational Conflict.

h1

A few of my own

May 17, 2009

Way back in 2005 I got interested in sculpting miniatures. I did it for a while, and even managed to finish a few which ended up painted in my collection. I finished a couple of zombies which I saved with the intention of having them cast up mostly for my personal use. None too surprisingly nothing ever came from it, but I still saved the greens figuring that  maybe I’d paint them up one day.

And now, four years later, along comes Black Orc Games. They have a program called Mini-Sculpt, which gives budding sculptors a chance to get their sculpts cast up and sold. It’s a simple deal: The sculptor grants the company full rights to the green, the company provides the sculptor with 20 casts of the model plus royalties based on the number of models sold. While this is hardly a huge money making opportunity for a sculptor, it gives people like me a great chance to see the results of their work made available to others. To be honest, it’s simply cool to paint and base a model and add it to your collection alongside those sculpted by Mark Copplestone or Kev White, and think that it was you who sculpted it. What’s even more cool is the idea that maybe someone, somewhere is doing the exact same thing, and maybe playing a game using your models.

What this all amounts to, then, is a shameless ad for my minis. It probably comes as no surprise that they are zombies, does it? They are by no means of professional quality in terms of detail or crispness, but I’m still quite pleased with them. One of them is an obese jogger, who apparently couldn’t even outrun a few zombies while the other one is a beach bum type, who was probably still going “whoa, bra” while the zombies were munching on him. The solid bases have since been replaced with tabs to enable these figures to fit into standard slottabases. They’re  heroic 28mm in scale.

They will eventually – I’ll be sure to post details – be available through Black Orc for the fair price of $1.00 apiece. Not only is this a great chance to add some cheap lead to your undead horde, it’s also a great way to support  non-pro sculptors such as me in our endeavours not to mention a way of thanking Black Orc Games for providing an opportunity like this.

As always, feedback is appreciated. Would anyone actually buy these? Or rather, will you?

h1

Future plans

May 13, 2009

Every miniature gamer dreams of a beautiful gaming board. Yes, even the ones saying that  piles of books covered with cloth and sand will do. A good, permanent table with no corner cutting in its construction. With none of the mishmash collection of chunks of cardboard and insulation foam and soda cans that we use as proxy terrain, but instead all those expensive but beautiful resin pieces, plastic and cork buildings (for the latter, check out Matakishi’s teahouse) and terrain painted and flocked in a uniform style. Anyone who’s ever wargamed will know what I mean.

As a kid I used to look at model railway setups and doll houses, and was fascinated by the intricate detail. You had climbers on mountain sides, people running to catch a train and tiny vegetables on tiny plates with tiny utensils to eat them with. I absolutely wanted to build something like that, but when you’re twelve you’re on a pretty tight budget. Skip forward 15 years, and I’m still on a pretty tight budget but with a lot more determination and vision. And thus was born my Suburbia project.

Suburbia will be a detailed gaming board depicting a small modern town, to be ravaged by zombies, vampires, werewolves, supervillains, aliens and all sorts of other nasty critters I can think of. It will be composed of O scale plastic model railway buildings (especially Plasticville) and resin accessories from companies such as Armorcast and Ainsty. While this will set me back quite a few euros, it will hopefully also provide me with motivation to get the thing finished. And while I’m doing this, I want to add a whole lot of small detail: crows on the cemetery’s tombstones (a shamelessly ripped idea, thanks Sho3box!), a small altar in the church, small critters running around town, trash in alleys..you name it! As a matter of fact name it, all ideas are more than welcome.

As for inspiration, I have a few sites from which to draw with the main players being the insanely cool Zombie Town! and the almost equally cool Combat Zone Chronicles. I have to admit that I won’t be going as far as ZT! in the interior detailing. I mean, I still want to finish the project in the forseeable future.

The board will probably be built on a fairly large sheet of 2cm thick MDF. I’m thinking of using magnetic receptive paint and small sheet magnets to help keep things like street furniture in place. I will paint a street grid on the table, with each terrain piece – be it a building, a park or whatever – mounted on a separate piece of plasticard that neatly fits the grid. This should provide me with a setup that’s easily modified and solid enough not to go flying around every time someone bumps the table.

I will post regular updates once the project starts. At the moment I’m still designing the whole thing, and waiting for the 7 Plasticville buildings that I got for cheap off eBay. Do I really need to say I’m really excited about this whole thing?

On the topic of populating my new town, I’m also running out of zombies to paint. As I can’t seem to decide whether to buy new ones from Studio Miniatures, Griffin Miniatures or King Zombie, I’m settling on a compromise of getting them all. Sweetness.

h1

Dead Simple – A quick zombie painting tutorial

May 3, 2009

The coolest thing about zombies for the wargamer? There are lots, so they look lovely on the table.

The worst thing about zombies for the wargamer? There are lots, which equates to a lot of work.

This tutorial will provide a quick and easy way to paint zombies to a good gaming standard. It leaves the painter room to embellish, too, while being easy enough for even a budding painter to produce fine results. So there’s a bit of something there for everyone. This style of painting is especially useful for some of the cheaper and rougher zombie miniatures on the market, but with a bit more attention works just as well for the classier ones too.

The principle? Zombies – whether you’re painting modern or fantasy models – are just regular people, with the notable exception of being dead. Hence, their clothing and equipment will paint up just like it would on any other model. Where the whole zombie-thing kicks in, is the whole ”dead” part.

For this tutorial I picked one of the Mega Miniatures zombies, a true flower child who has found himself a juicy leg and is now literally one of the Grateful Dead.

Unpainted model

Unpainted model

Step 1: Pick up your favourite zombie model. Or, if you’re just starting on your zombies using a tutorial, one that you don’t really like that much.  Clean the model as usual, and prime it black. We are looking for a finished zombie that’s dark and menacing, and a bit dirty. A black basecoat will help you with that.

Step 1: Basecoat the model black

Step 1: Basecoat the model black

Step 2: Paint the zombie’s clothing and equipment just like you would on any other model. Don’t touch the skin yet. I like to experiment on zombies’ clothing and other details, using different techniques. If something looks awful, you can just slap some blood on it. The mini will be lost amidst your horde, anyway.

Step 2: Paint clothing etc.

Step 2: Paint clothing etc.

Step 3: Paint the skin with the palest skin tone you have. You can go as far as ivory (a yellowish, natural white). Don’t worry about the paint not covering the black basecoat all that well, and don’t paint too thick layers on. In fact, the black basecoat shining through will add to the skin’s blotchy, dead appearance. Doing this also saves you time, which is lovely when you have dozens of zombies lined up for painting.

Step 3: Paint the skin.

Step 3: Paint the skin

Step 4: Give the zombie’s skin a light blue wash, using either a very thinned down blue paint or ink wash (I use GW’s old blue glaze). Don’t overdo it, you want a zombie instead of a blue-skinned alien. You can also experiment with different shades of blue and green for different end results. Make sure the wash ends up all over the skin, especially on places you want to accentuate, such as the eyesockets.

Step 4: Give the skin a light blue wash

Step 4: Give the skin a light blue wash

Step 5: Use a very thinned down black ink (again, I use GW’s) to accentuate some shadows (as in step 4, the eyesockets are important, as are cheekbones) even further and generally ”dirty up” the zombie. The deeper shadows give the zombie a more menacing, gaunt and even deader look. If you want to use the black ink to add some splotches of dirt to the zombie’s clothing, now’s a great time.

Step 5: Use black wash to accentuate shadows

Step 5: Use black wash to accentuate shadows

Step 6: The blood. Yes, there’s always blood. I like my zombies bloody and gruesome, death by undead should never be too pretty. Take some brownish red paint (GW’s Mechrite red for me), and add loving splashes of it on the model. Use your imagination! How did he die? Throat torn out? Paint a lot of blood on the throat and down the front of his shirt. Has he eaten someone? Some blood around the mouth and chin. The zombie carries a weapon, did he defend himself before he died? And so on, you get the point. Again, don’t overdo it. You don’t want to end up with a walking clot of blood. Actually, if you do then feel free to overdo.

Step 6: Add blood

Step 6: Add blood

Step 7: Simple red paint won’t do. It just looks fake and too clean, doesn’t it? Paint liberally over it with dark brown ink (GW, surprisingly). Let the ink overlap the paint’s borders for a more natural and dirty look. You’re gunning for the gross-factor here. Messy, dirty, icky. Let your imagination run free. A lot of blood seeping into the zombie’s clothing? Paint a lot of brown ink on it for a darker overall effect.

Step 7: Paint over the blood with brown ink

Step 7: Paint over the blood with brown ink

Step 8: Dot in some black ink to represent coagulated and dried blood. By now your zombie should look fairly awful, in a good way. I also added some black ink to the eye sockets at this point, since that will make the eyes stand out more.

Step 8: Dot in some black ink

Step 8: Dot in some black ink

Step 9: Paint the eyes. I simply use a drop of very light grey, white’s fine too. Don’t bother with pupils, the full-grey eyes will look creepier and more dead. You can also pick out other detail, such as teeth. For once, don’t stress too much if the eyes end up a bit lopsided. They’re zombies, they don’t mind.

Step 9: Paint the eyes

Step 9: Paint the eyes

Step 10: Base the model to your liking, and you’re done!

Step 10: Base the model

Step 10: Base the model

And next? Just repeat this procedure a hundred times or so, and you’ll have a miniature zombocalypse on your hands. Oh, and if someone actually tries this tutorial out, I’d love to see the results!

h1

From the painting desk #2

May 2, 2009

As time goes by, I find myself painting less and less for gaming purposes and more for painting’s sake. For me the best aspect of the hobby is probably the part where I get all excited about some new genre or line of miniatures (which will take years to paint), start a modeling project (that never gets finished) or buy a new rule set (that gets played a few times). Of course I still buy miniatures with the idea that they’ll be used in one game or the other, but I always seem to skip the whole gaming part. Hence, I have a ton of unpainted SWAT for those eventual massive zombie apocalypse games, a fair amount of near future troopers and Horrorclix Aliens for gaming the whole Aliens vs. Colonial Marines scenario, not to mention cops, bikers, terrorists, bank robbers, werewolves, vampires, dragons and whatnot. The fact that I have all these unfinished projects naturally doesn’t stop me from adding to them whenever some new models catch my fancy. Happily, though, I find that I’m not really alone with this situation. Seems that at least every other miniature enthusiast shares the problem(?) of a massive backlog of unpainted lead. Oh well, at least I’ll have something to do when I retire in 40 years or so.

With this introduction, here are the lates minis I’ve painted. You can click on the pictures for a closer view, but in all honesty my level of painting doesn’t really encourage such a thing. You have been warned.

The first is a lieutenant from em4 miniatures for my unit of modern/near-future troopers. These guys serve a double duty as both Colonial Marines dying at the claws of xenomorphs and generic military for trying to contain zombie outbreaks and ending up as nom. They’re clothed in simple urban camouflage gear to suit either of these settings.

Lieutenant

Click for a larger version

The second model is a female from Foundry. She could be used for a lot of things. A corporate bodyguard, a businesswoman-turned-survivor, an assassin, a bank robber? I like how the model turned out, especially the face and the red of the clothing.

Babe with gun

Click for a larger version

I’m happy with both models, and they were a joy to paint. Both were simple, clean and crisp sculpts with well defined detail. Regardless of whether they’ll ever see any gaming use, they’ve already justified me buying them.

h1

From the painting desk #1

April 28, 2009

Lately I’ve been painting zombies by Mega Miniatures. The Screaming Alpha has posted an excellent review of these, which I completely agree with, so instead of typing all that again I advise you to pop over to TSA and read the review. And while you’re there, subscribe to the feed, it’s an excellent blog!

The Mega Miniatures zombies are a joy to paint. While they aren’t the most detailed or crisp of sculpts, they can be brought to life (awful pun, sorry) by relatively simple painting. In fact, the upcoming zombie tutorial got started while I worked on these fellows. I hope the few pictures below serve to illustrate on one hand the roughish sculpting but on the other hand the way the characterful models start to look a lot lovelier with a suitable paint job. Click on the images for larger pics.

And a final shot with all of my so far painted MM zombies, including a few lovely zombie kids and the delightful zombie hooker. Don’t let her nom on your junk.


h1

The road to a good tutorial

April 26, 2009

For the past few weeks I’ve toyed with the idea of writing a small tutorial on how to paint zombie miniatures. Eventually I up and wrote the thing, and with my new camera arriving last Friday, the tutorial is well on its way. I actually went through the tutorial and took photos of the process, and realized that in order to take a series of miniature photographs you need a fixed camera + lights setup. At least if you want  the photos to be similar in hue, exposure and color balance. I do, don’t know about you people.

The tutorial itself is a simple 10 step guide from this:

step01

to this:

step9

…with the tenth step being “base to your own liking.” The tutorial is fairly quick. As mentioned before, I’m a conscientious painter and as such my painting tends to take a lot of time. With this technique I’m painting a couple of solid zombies in one evening, from basecoat to varnish. For me this – painting a model in an hour or less – is like speedracing and as such prompted me to write it up. I hope to get the tutorial with full photos up next week, once I have the whole photo setup ready.