Archive for the ‘Miniatures’ Category

h1

From the painting desk #34 – Weary old pirate

August 4, 2015

Another painted pirate! I wanted a change from painting to ship, so went for something smaller. He’s a Black Scorpion miniature, and very Long John Silver-ish with his missing leg and crutch. I painted him as a weather-beaten, wiry older pirate. I think the end result is suitably nasty looking individual, definitely up to no good.

Click for a larger version

Click for a larger version

For the base I used a grass tuft from Army Painter. It was my first time using basing tufts, and I’m in love! Expect plenty of tufts in the future, and give them a go if you haven’t already.

This was the 19th mini I’ve painted in 2015, so better speed it up a little. Comments welcome!

h1

Bless those Swedes #3

July 21, 2015

I’ve noted in previous posts that IKEA is often a very nice place for a wargamer to visit, so here’s my third instalment of Bless those Swedes (see here and here for the previous ones).

Recently the photo quality on the blog has deteriorated, mainly due to me not focusing that much on lighting. As I like quality photography as much as the next person, I wanted to do something about this, and the solution was quite simple. I just bought one of these TJENA boxes:

tjena

Photo © IKEA

Combined it with a set of these DIODER led strips:

dioder

Photo © IKEA

And ended up with this (with an added A4 sheet):

Click for a larger version

Click for a larger version

Now as you can see, the light is fairly yellow in tone, and the brightness isn’t the best possible – which was a bit of a letdown. However, this was easily remedied by using my desktop lamp with a daylight bulb:

Click for a larger version

Click for a larger version

As a result I can shoot fairly nice pictures using my old pocket camera, spending very little time on colour correction and achieving lovely, even lighting. The shade at the lower edge was caused by the camera itself due to poor positioning.

Click for a larger version

Click for a larger version

The wires are neatly hidden behind the separate bottom plate of the box, and there’s a convenient hole in the back for the power cord. All in all this cost me 25 euros, which isn’t a bad price. If you’re looking for a lightbox on the cheap, this might be a way to go. Of course if you can pick up brighter, whiter led lights, all the better! While the difference in photo quality may not appear to be huge, the amount of time saved in post processing is very significant – a lot of my photos have needed a lot of tweaking in Photoshop to make them presentable.

There you go, a lightbox on the cheap which took all of 15 minutes or so to make. Good enough for me!

h1

18th century comparison

July 17, 2015

I love miniature size comparisons. With plenty of manufacturers out there, it’s useful to know which manufacturers fit together size and style wise. I’m not too fussy with what lines I use together (as you can see from my Colonial Marines), but I know a lot of people are very particular about it. As I’ve amassed a lot of pirate/18th century miniatures in 28-ish mm recently for my small project, I figured I’d do a quick comparison for the benefit of everyone out there. Posts like this are something I tend to google a lot, so this is just paying it forward. This isn’t a review as such, more a quick comparison.

The ranges compared are 18th century sailors by Galloping Major, pirates by Black Scorpion and Foundry and FIW civilians by Redoubt. Here they are side to side:

Click for a larger version

L to R: Black Scorpion, Galloping Major, Foundry, Redoubt

In my opinion all these can be used together, but as said above, I’m not fussy. If you want matches, here are my suggestions:

Black Scorpion has a different style from the others. They also have a fairly large range, so you could just use them exclusively. If the height difference is the thing bothering you, Galloping Major matches up nicely. Style wise Redoubt’s weapons are thinner than Foundry’s or Galloping Major’s and match up quite well with Black Scorpion.

Redoubt can easily be mixed with both Galloping Major and Foundry.

Galloping Major matches Black Scorpion in height but not style. They’re a good match with Redoubt and Foundry style wise, but in general chunkier and taller. However, you could circumvent the height difference by removing the integral base from the Galloping Major minis.

Foundry are short, but style wise match Redoubt and Galloping Major. You could remedy this by giving them a boost under their integral base using putty or a washer.

So that’s my take! As a disclaimer, note that these are single samples from larger ranges which in themselves have internal variation and and..oh heck, I’ll just leave it to Captain Barbossa:

As I like all of these minis and don’t want to unnecessarily put you off from buying them, shown below is a picture of two Foundry pirates and a Black Scorpion one. As you can see, you can do wonders with matching basing and I think they go together just great, even with the height difference.

Click for a larger version

Click for a larger version

Hope this post proves useful! If it does, I’d love to hear about it.

h1

Holding it up

July 10, 2015

I’ve been working hard on the ship in the past few weeks, and it’s almost ready to paint. Here are the latest updates. I sadly forgot to take a lot of photos, but this should give you a fair idea.

I got to work on the ship’s hold. The key elements were stairs and something that I think was meant to represent a chest.

Click for a larger version

Click for a larger version

There was also a large, barred gate leading to another part of the hold. I decided to remove the door, leaving a very large doorway. The hole in the background is one of the ship’s toy functionalities, as there’s a matching piece that blows out when a button is pressed – a mechanism I left intact.

Click for a larger version

Click for a larger version

I went to work on the stairs and what I’ll now call the chest. I wanted the stairs to be usable in games, so I used plasticard and build a platform halfway down the stairs to allow me to place minis. The chest was given a very rough treatment, as my plans only involved covering it with planks.

Click for a larger version

Click for a larger version

Sadly, there are WIP pictures missing here, and I’ll just skip ahead to where the stairs and the chest are finished. You can see I also chopped down the pegs that were originally holding the ship’s toy cannon. As you can see I added some details to the stairs to make them look a bit nicer. I also added planking around the battery case for the same reason. As you can see, the whole thing has already been sprayed a glorious brown.

Click for a larger version

Click for a larger version

I gave the doorway a frame, but left it otherwise untouched. I figured the size makes it look like the ship is capable of taking in loads of cargo.

Click for a larger version

Click for a larger version

As you can see, the stairs can nicely accommodate a few pirates.

Click for a larger version

Click for a larger version

Apologies for the unusually poor quality of the photos, they’ve been hit with a fair amount of blur and excess lighting. The uneven, bleached look in some of the brown areas isn’t only due to lighting, however. I spray painted part of the ship during really humid weather, i.e. Finnish summer, so I got some of the lovely frosting that tends to happen. Luckily the brown paint it there primarily to serve as a basecoat, so no real harm done.

Here’s a final photo of the ship in its present state.

Click for a larger version

Click for a larger version

As crazy as it sounds, all I need to do is rough up the mizzenmast, add some planking to the forecastle and basecoat both, and I’m actually ready to start painting this thing. For the paint job I’m thinking of something similar to the one on this model of Bartholomew Roberts’ Royal Fortune, so burnt umber with a dash of red. Of course I want to throw in something a bit more extravagant, so you can be sure you’ll be seeing a lot of gilding as well. Getting there!

h1

Unleash the Cagafuego!

July 4, 2015

In my previous post I lamented too small cannon, so I wanted something bigger. Remembering I had just the thing in my bits box, I got to work. Said “thing” is a WHFB cannon from the 6th edition boxed set, now 15 years old. It’s not in the best shape, having had bits glued, removed, re-glued and so on, as well as fairly haphazard filing and smoothing of mould lines and such.

Courtesy of me 15 years ago

Courtesy of me 15 years ago

The cannon itself is a big, ornamental beast as fits the gothic fantasy look of WHFB. This led me to thinking that obviously such an ornamental piece on a pirate ship must be looted from the Spanish. Seriously, is there another explanation? I think not. This also gave me the chance of using one of my favourite words ever, as I named it…

Cagafuego!

Impressive name, isn’t it? Of course, it has a historical background, as it was the nickname of a Spanish ship captured by Sir Francis Drake. As Wikipedia will tell you:

Nuestra Señora de la Concepción (Spanish: “Our Lady of the (Immaculate) Conception”) was a 120-ton Spanish galleon that sailed the Peru – Panama trading route during the 16th century. This ship has earned a place in maritime history not only by virtue of being Sir Francis Drake’s most famous prize, but also because of her colourful nickname, Cagafuego (“fireshitter”).

Seriously, is there a better name for a massive Spanish cannon than “Fireshitter”? I think not. It appeals both to my love of history and 10 year old’s sense of humour.

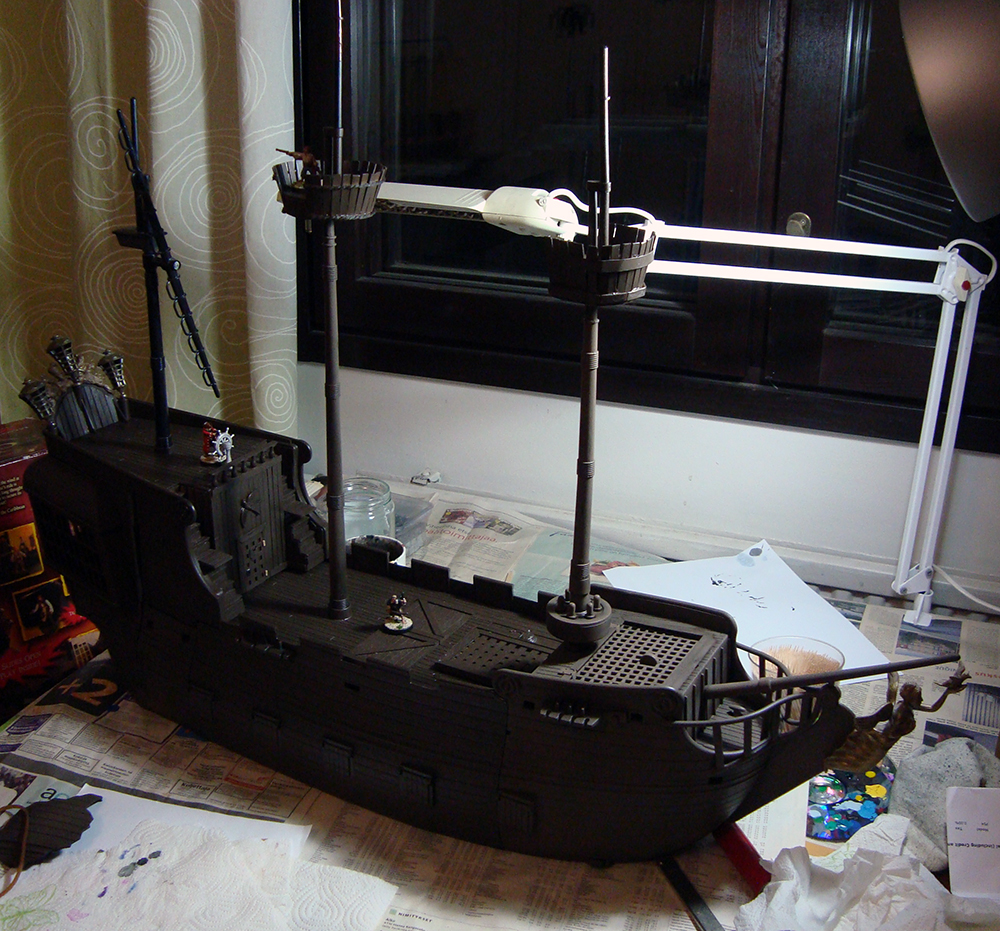
Cagafuego is a huge piece, and I’m thinking that its role on the ship is that it’s a piece mainly for intimidation. Due to the build of the ship and for practical reasons, it’s only going to carry some seven cannon altogether – much fewer than a ship of this size historically would have. Of these seven, six will be normal sized and Cagafuego much larger, so I’m thinking that it’s always a bit of a spectacle when it’s utilised. You know:

– Captain, they’re not striking their colours.

– Very well then. ROLL OUT CAGAFUEGO!

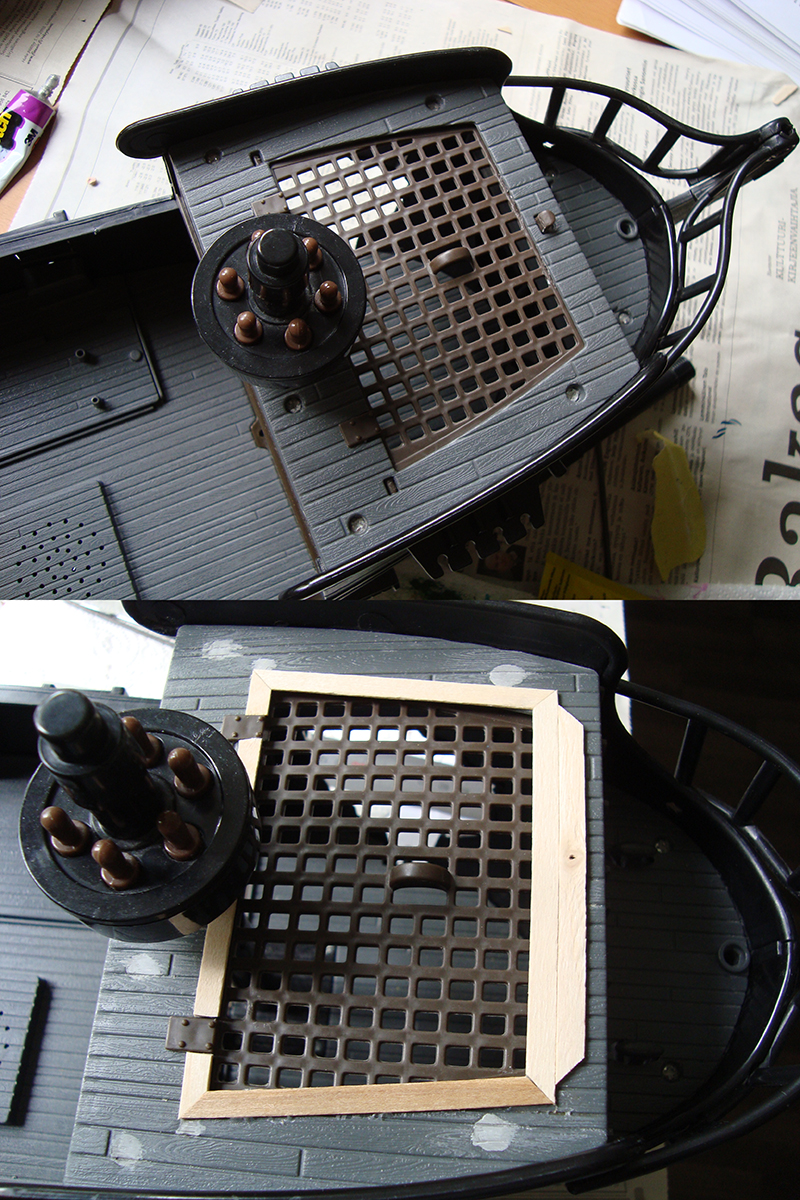
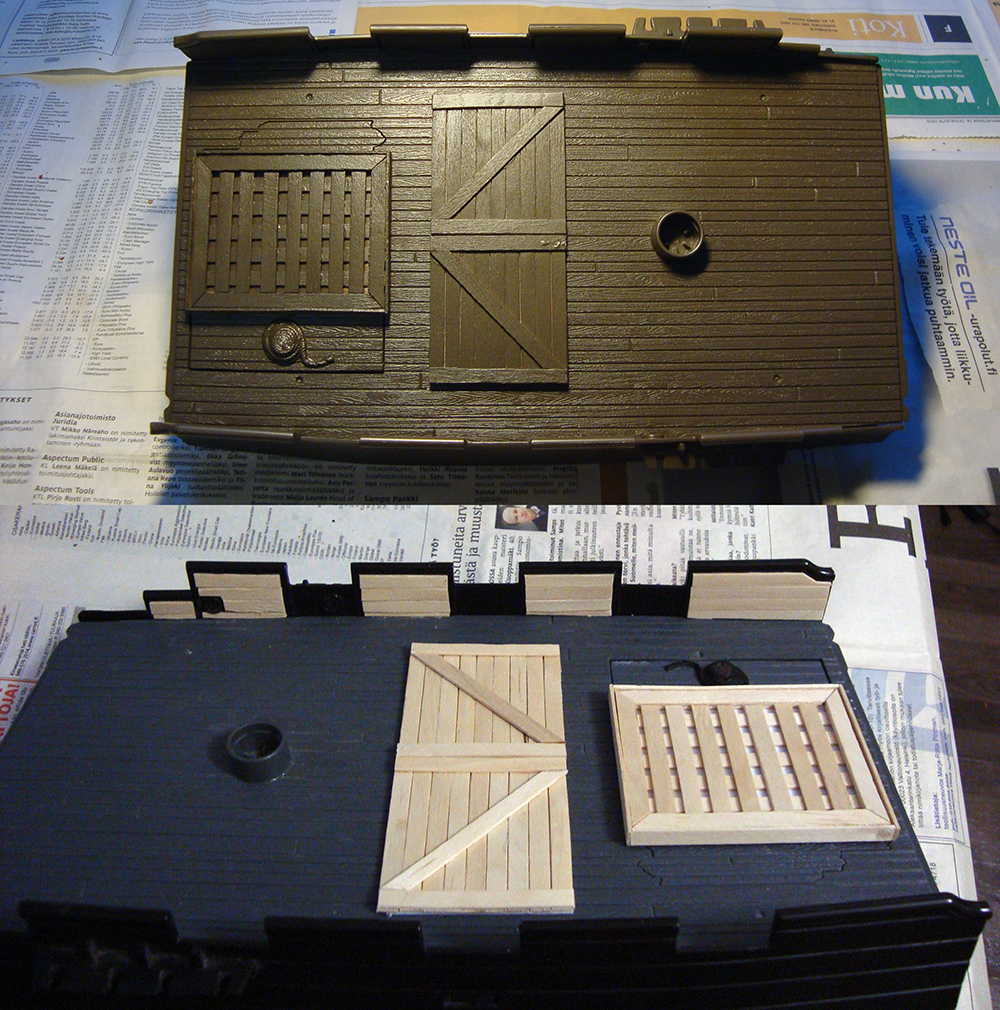
The only problem was that I didn’t have a carriage for the gun as the original mount was a field one, not suitable for ships. Having grown more accustomed to working with plasticard and coffee stirrers, I figured I’d try my hand at building the carriage from scratch, resulting in this:

Click for a larger version

Click for a larger version

Click for a larger version

Click for a larger version

It turned out alright, I think! Sure, anyone into things like history and realism will probably find plenty of things wrong with it, and there are some irregularities here and there, but to my fantasy pirate eye it looks as it should. The core structure is plasticard with an old Warmaster base underneath. The wooden bits are coffee stirrers, the wheels are cut from 10mm diameter dowel rod and the axles are decorative studs meant for clothing.  The smaller iron rings are plastic pieces from the original cannon set and the bigger ones are from WHFB orc weapons. As with a lot of my woodwork, this one also relies a lot on the “it’ll look nicer once painted” factor, but I have high hopes!

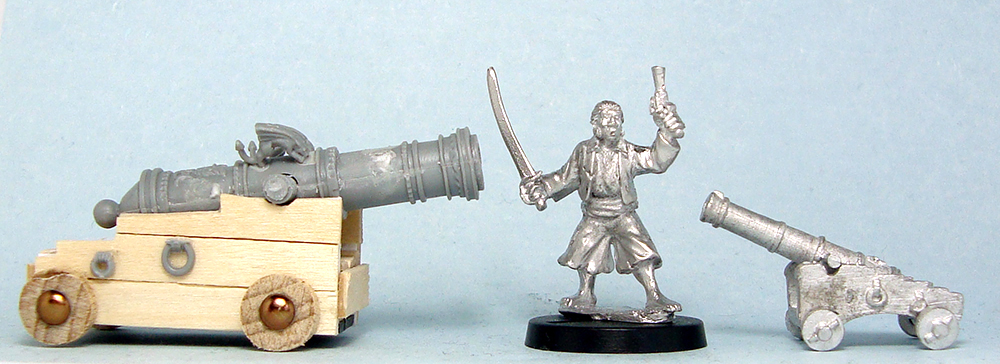
To cap off the post, here’s a comparison shot of Cagafuego and my existing Ainsty cannon as well as a Foundry pirate. Neat, right?

Click for a larger version

Click for a larger version

h1

Run out the baby guns!

June 30, 2015

Eventually, any project will suffer minor setbacks. I received my order of 6 cannon from Ainsty. Lovely, crisp castings, great detail…and far too small for my heroic-scaled ship. See here:

Click for a larger version

Click for a larger version

While it’s quite realistic in size, that’s very much the problem. I’m not at all faulting Ainsty, as the problem stems more from my massive ship – even with the base the cannon barely reaches over the side at the gunport. I’m going to need bigger guns, so I put in an order with Thomarillion for some more beefier guns:

Photo ©Thomarillion

Photo ©Thomarillion

Now, what to do with the six guns I already own? They will probably find employment in small coastal settlements, guard towers and such. I’m also thinking I might use some of them as very large swivel guns like shown below, what do you think? I feel it might work with a bit of converting.

Click for a larger version

Click for a larger version

That’s all for now! I’ll put up a post once the Thomarillion cannon arrive. Should someone arrive here looking for measurements for the Ainsty cannon, they’re

Length of cannon 30mm
Length of cannon + carriage 34-35mm
Height 15mm (highest point with level barrel)
Width of carriage + wheels 21mm


h1

Foredeck work

June 15, 2015

The ship project is my first time working with coffee stirrers. It’s immensely fun and satisfying work, as the perfectionist in my rejoices every time I manage to make a nice, fitting angle. On that note I present to you my latest work on my ship’s foredeck.

Click for a larger version

Click for a larger version

The foredeck isn’t a very large part. The deck planking had plenty of holes for screws in it, so I filled those with ProCreate putty. While they don’t look very nice, once painted they blend in quite well. The lattice hatch was designed to open and drop action figures down into the hold. As obviously I didn’t want that to happen to my miniatures, I glued it shut. While the hatch itself looked fairly nice, it looked weird situated sort of under the deck planking. I added a rim around it, and I think this improved its look a lot. It was the most difficult cutting work so far, so you can imagine how happy I was when everything finally fit into place. I added a decorative piece (the foremost plank) to cover up the cut off peg that originally locked the hatch in place. I liked the look of the hatch hinges, so I left them in place. The belaying pins at the base of the mast can be pressed for awesome sound effects, so they’ll definitely be left in place. With this part done, the foredeck only needs a little more planking work and two more screw holes filled (oh my, that sounded somewhat inappropriate). After that it’s a bit more work on the hold and that’s it. I’m actually finishing this thing!

h1

Paint it brown!

June 9, 2015

In what has to be one of the most boring updates ever on this blog, I report that the main deck of my pirate ship has now been painted a flat brown. That’s it.

Click for a larger version

Click for a larger version

…ok, as an afterthought I added a before shot, showing the paneling I added to the rail. It still doesn’t make this post super interesting, but it’s something! The main thing I want to report is that the project is still going strong. I’m starting to surprise myself.

h1

Batten down the hatches!

May 31, 2015

Work on the pirate ship continues after a short lull spent painting the crew and watching Black Sails (watch it if you haven’t!). Rough work in progress photos as usual.

The poop deck is pretty much finished, apart from the possible addition of a small lantern next to the door. I decided not to work on the interior, as it would be extra work for little added value. I added a ship’s wheel from Eureka Miniatures that I ordered from Fighting 15s. The door got hinges cut from a cocktail stick to cover some rough cuts in the plastic. I also added a door handle of sorts, cut off the end of a WHFB orc weapon. Two holes left from removing the ship’s original wheel were filled with ProCreate and sculpted to match the decking.

Click for a larger version

Click for a larger version

With the poop deck more or less done, I went to work on the main deck. While there already was a hatch with grating, it was far too big in terms of scale. Also, the removal of a fighting functionality (pull a lever, and two disks in the deck rotate, making two action figures fence if they’re stuck to the disks) left me with two large holes in the middle of my deck. After spending a lot of time thinking and trying out various materials, I whipped out the good old combination of plasticard and coffee stirrers and got to work. Here’s a before and after shot:

Click for a larger version

Click for a larger version

This is some of my favourite work on the ship so far. I’m slowly getting to be a little more proficient with all the cutting and gluing, and I think it shows! I have no idea on whether you’d find a setup like that on an actual ship, but hey, this is my pirate fantasy.

The lines you can see in the deck are from another toy functionality that I removed – you could press on one end of the grating piece to make the other end launch up. That wasn’t something I wanted happening with miniatures, so I just glued it shut. I’m not sure if I’m going to fix the gaps it left, probably not.

Somewhat surprisingly there’s not much work on the main deck. I still need to add planking detail to the insides of the railings, but that’s it!

Praise, constructive criticism and general rambling in the comments welcome as always!


h1

From the painting desk #33 – Another pirate

May 26, 2015

As you’ve no doubt noticed, I’m painting pirates. Here’s another one from Foundry, my 12th painted model of the year.

Click for a larger version

Click for a larger version

It’s funny that I said in the previous post that the pirate project is letting me use all my bright colours, as this one mostly had fairly muted colours. I couldn’t help it, as he just looked like a shabby individual even unpainted. I did give him a purple scarf though, so at least some extra colour was added. One thing I’m liking a lot in this project is that a pirate crew is a perfect chance to throw together a group of models without regard for uniformity. In my opinion the muted palette works on this model, and he’s a fine addition to my crew.  Feedback welcome as always!